
When you have several channels and a team of editors, a problem comes up: how do you give your team access without losing control over all the channels?
Channel owners usually add editors directly to the Telegram admin panel. But that's risky — if one of the admins breaks the rules, every channel they were linked to can get blocked.
Sections solve this problem. You grant permissions through the bot without adding people to the channel's admin panel. If one of the editors gets banned, it won't affect the channel.
How to create a section for an editor in a project
1. Tap Settings in the bottom menu.
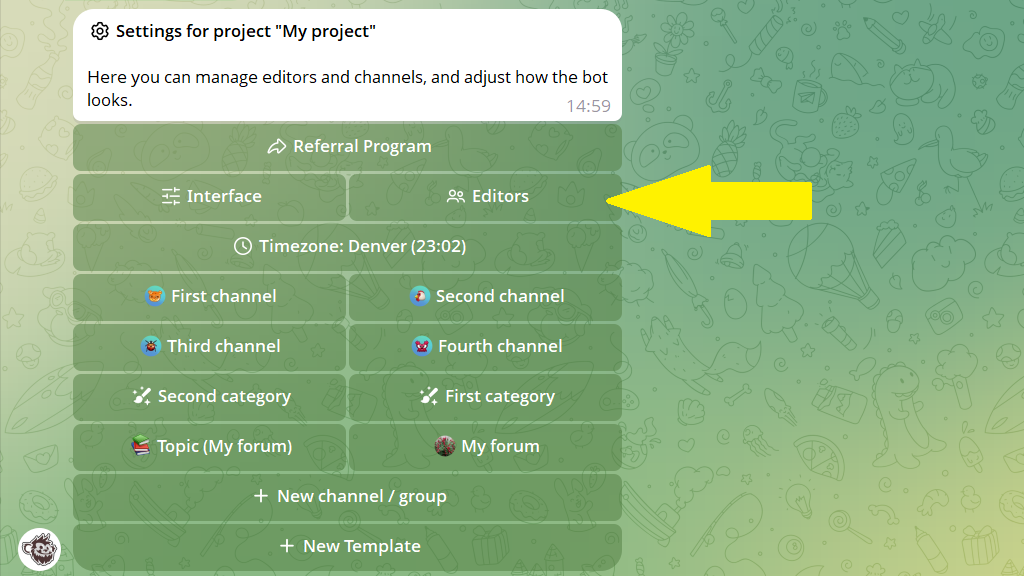
2. Go to the Editors section.
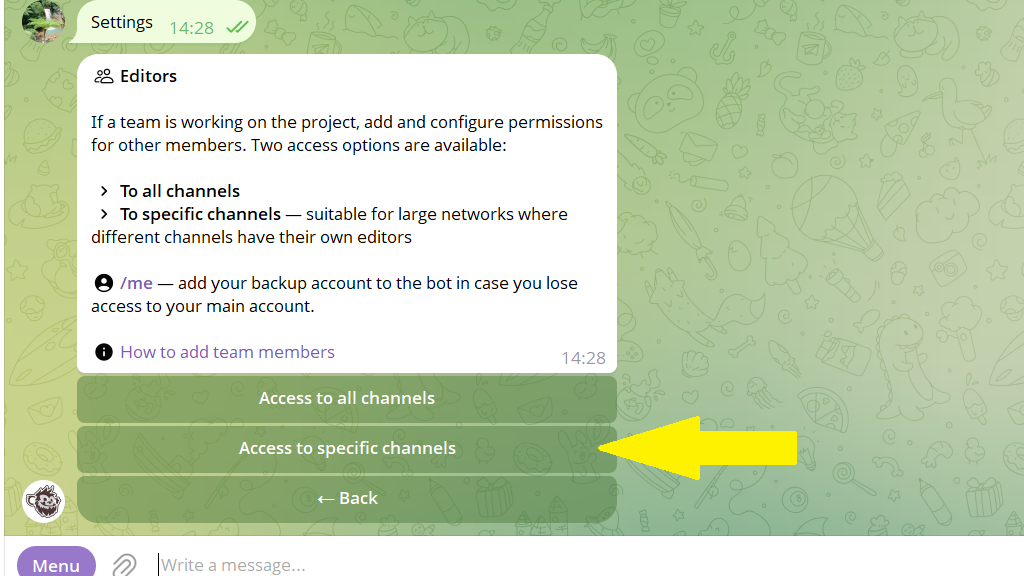
3. The bot offers a choice — give the editor access to all the project's channels or only some. The second option means creating a Section. Choose it.
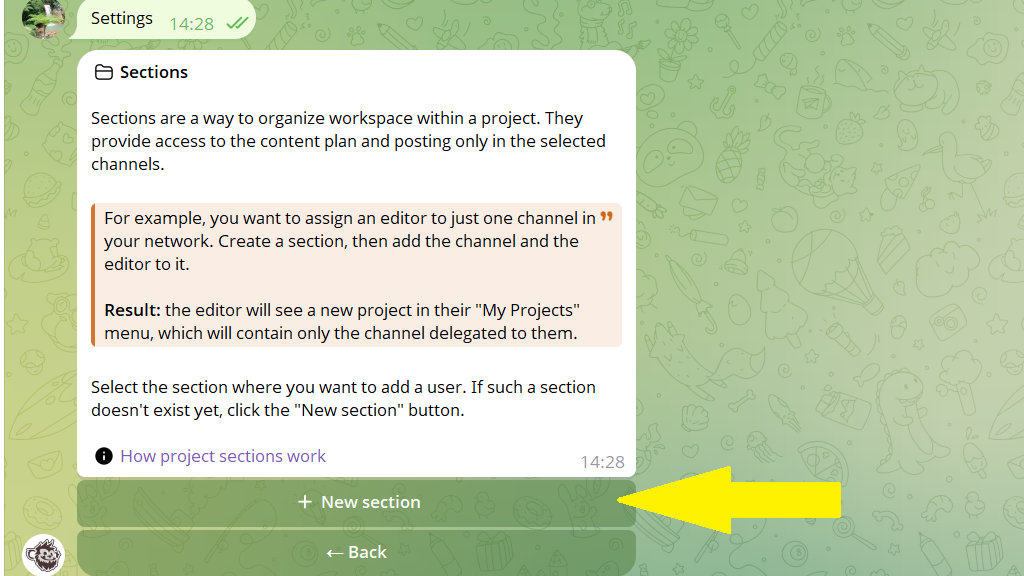
4. Tap New section.
5. Come up with a name for the section.
6. Then tap Select channels and specify one or more channels you want to put in the section.
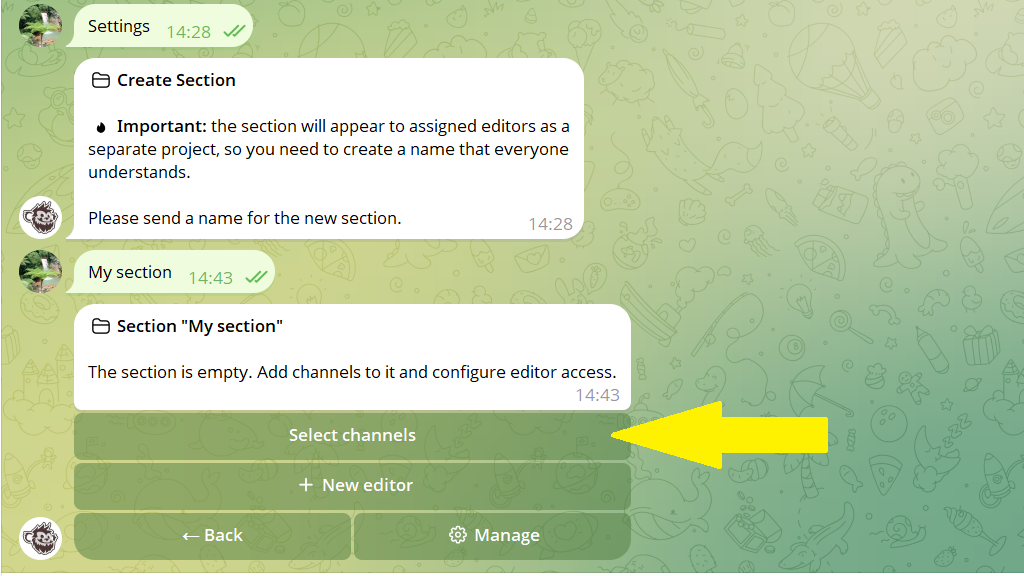
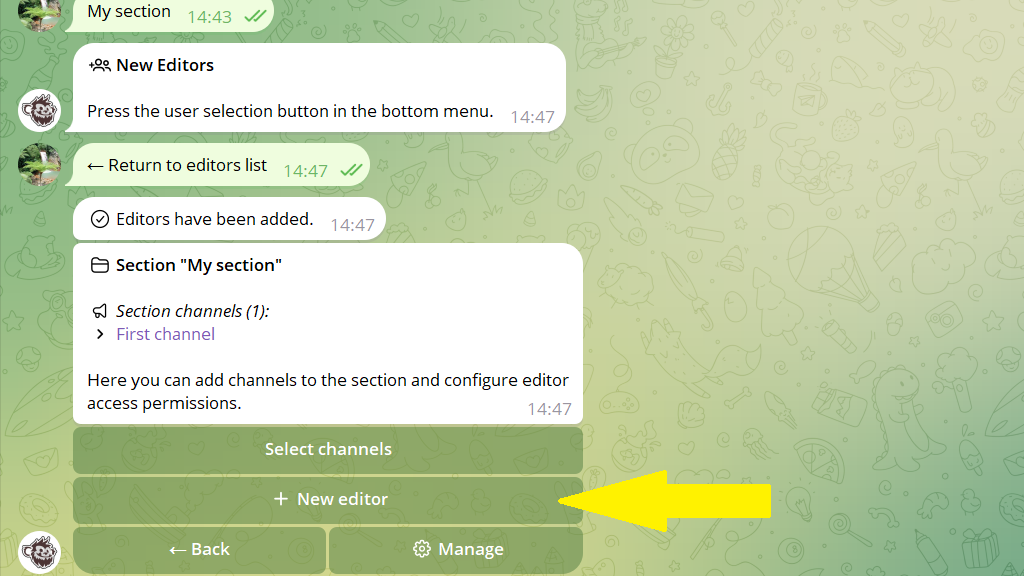
7. Tap New editor and choose the user from your contact list whom you want to assign as an editor in the section.
See also:
What the editor sees
When you add an editor to a section, a new project appears in their My projects menu — but with limited access. They see only the channels you allowed them.
Example: You have 10 channels, but an editor only needs access to two. You create a section, add those 2 channels and the editor to it. Now they work only with those and don't see the other 8.
Flexible permission settings
Within each section, you assign individual permissions to each member.
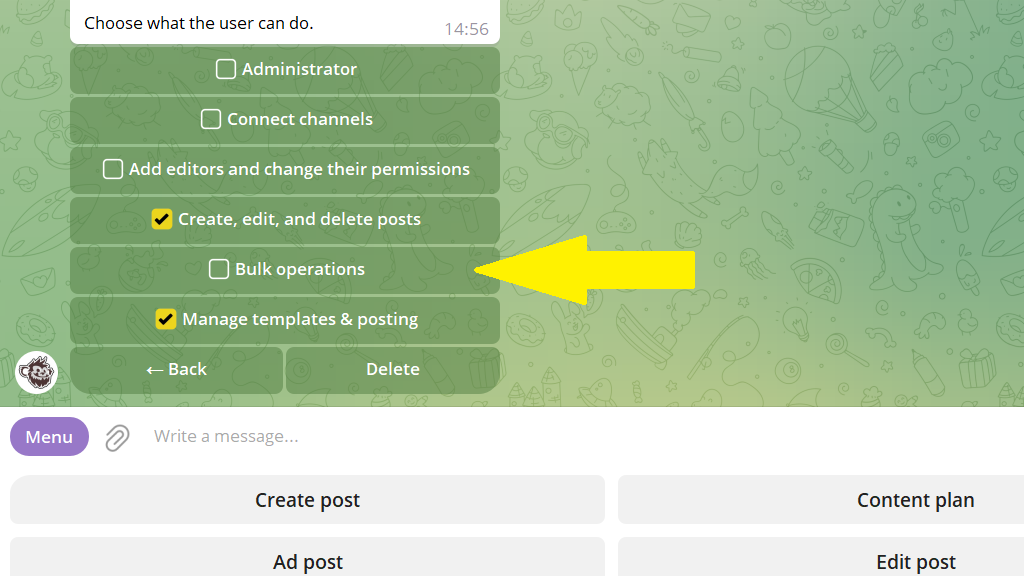
By default, a new editor gets these permissions:
- Working with posts — creating, editing, and deleting them.
- Managing default settings, templates, and the schedule.
To change the permissions, open the user's profile and check the privileges you need.
How sections work
Think of a section as a separate mini-project inside your main project. Each section has:
- Its own channels (a part of the overall list)
- Its own editors with their configured permissions
- Its own folders and templates
- Its own default settings
What the project and its sections share
The project and all its sections use the same channel settings:
- The content plan
- Schedule slots
- Watermarks and signature
- Favorite buttons
- AI Assistant prompts
For example: if an editor in a section changes the post schedule, the new slots appear in the main project too, and in other sections that have this channel.
The benefits of sections
- Security — permissions are assigned independently of the permissions in the channel itself; banning a user won't get the channel blocked.
- Convenience — everyone works only with the channels they need.
- Control — you set each team member's permissions to fit your tasks.
- Flexibility — one channel can be in several sections, and one editor can work with several sections.
Sections help turn the chaos of many channels and editors into an organized system where everyone knows their tasks and doesn't get in each other's way.
A practical example
The task: You have a network of 5 regional channels. Each region has its own editor, and you also need to publish shared ads to all the channels from time to time.
The solution:
- You create 5 sections — one for each region.
- You add the corresponding channel and editor to each section.
- The editors work only with their own channels.
- As the owner, you see all the channels and can publish ads across the whole network at once.
